Overview
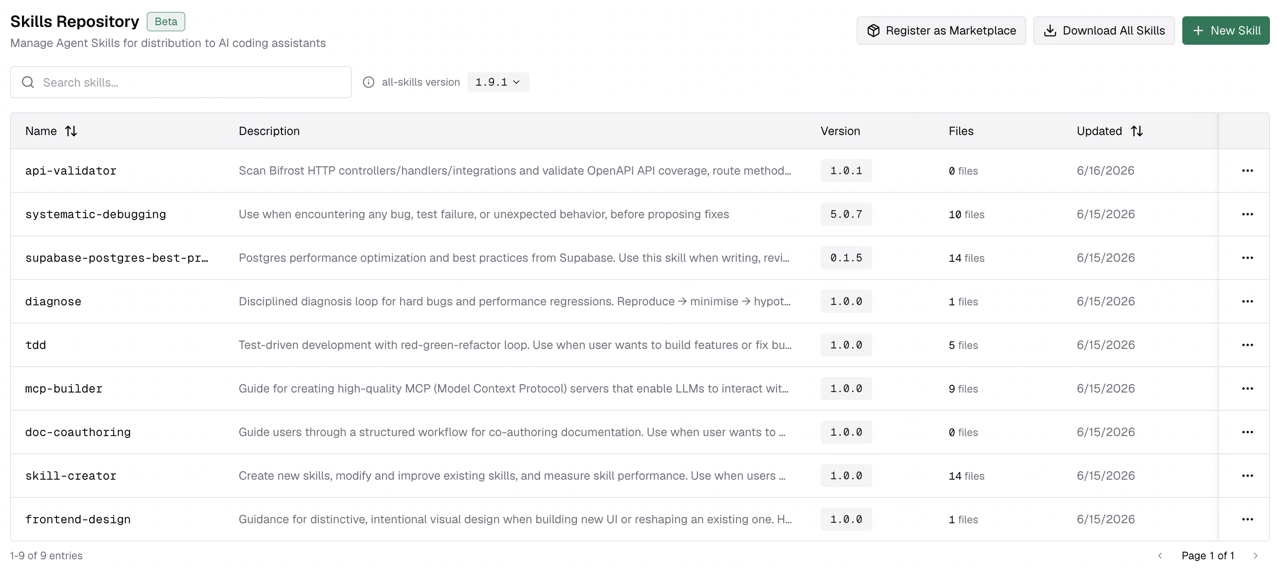
The Skills Repository turns Bifrost into a central place to manage Agent Skills: reusableSKILL.md instructions plus any supporting files an agent needs.
Use it when you want to:
- create and maintain skills from the Bifrost dashboard
- attach reference files, examples, scripts, or assets to a skill
- publish immutable versions with SemVer
- register Bifrost as a skills marketplace for Claude Code and Codex
- install either one skill at a time or the bundled
bifrost-all-skillsplugin
Management actions are authenticated and permission-gated. Marketplace and download URLs are public so CLI agents can fetch and clone skills without carrying dashboard credentials.
Create a skill
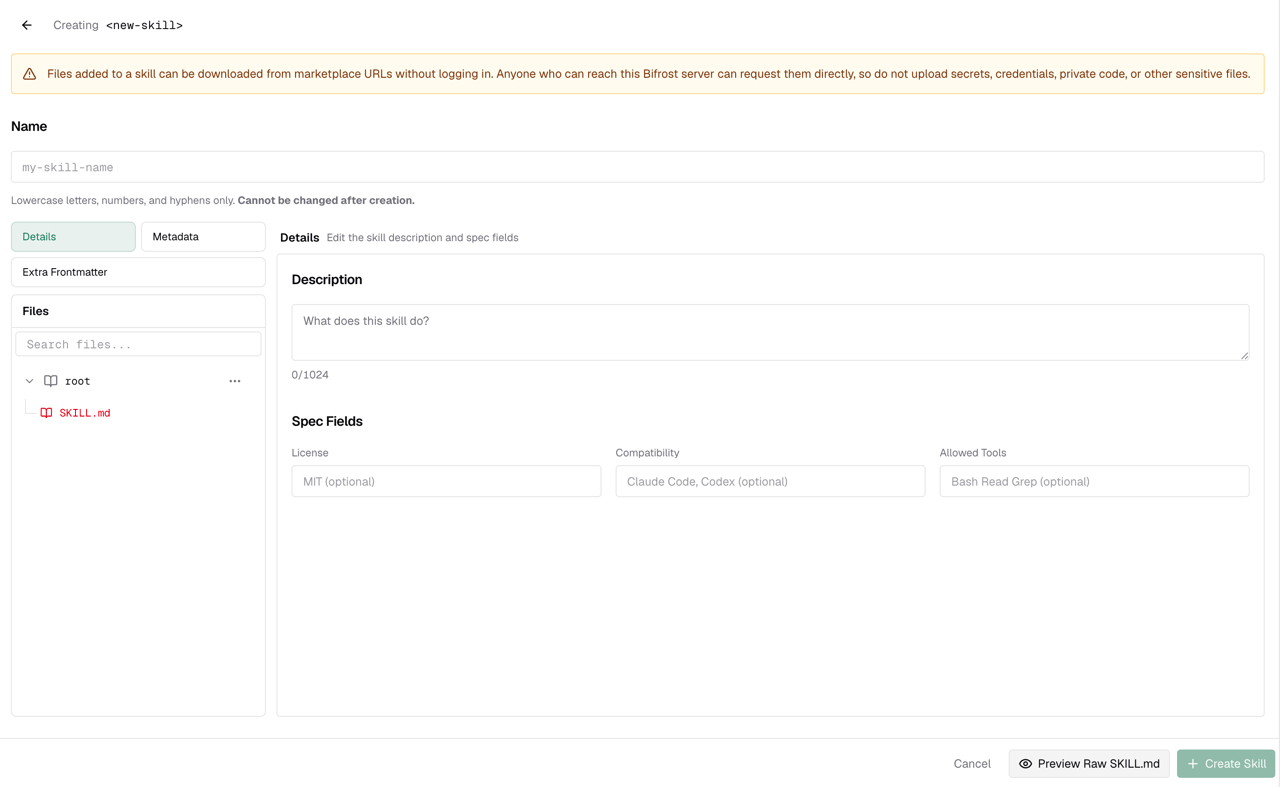
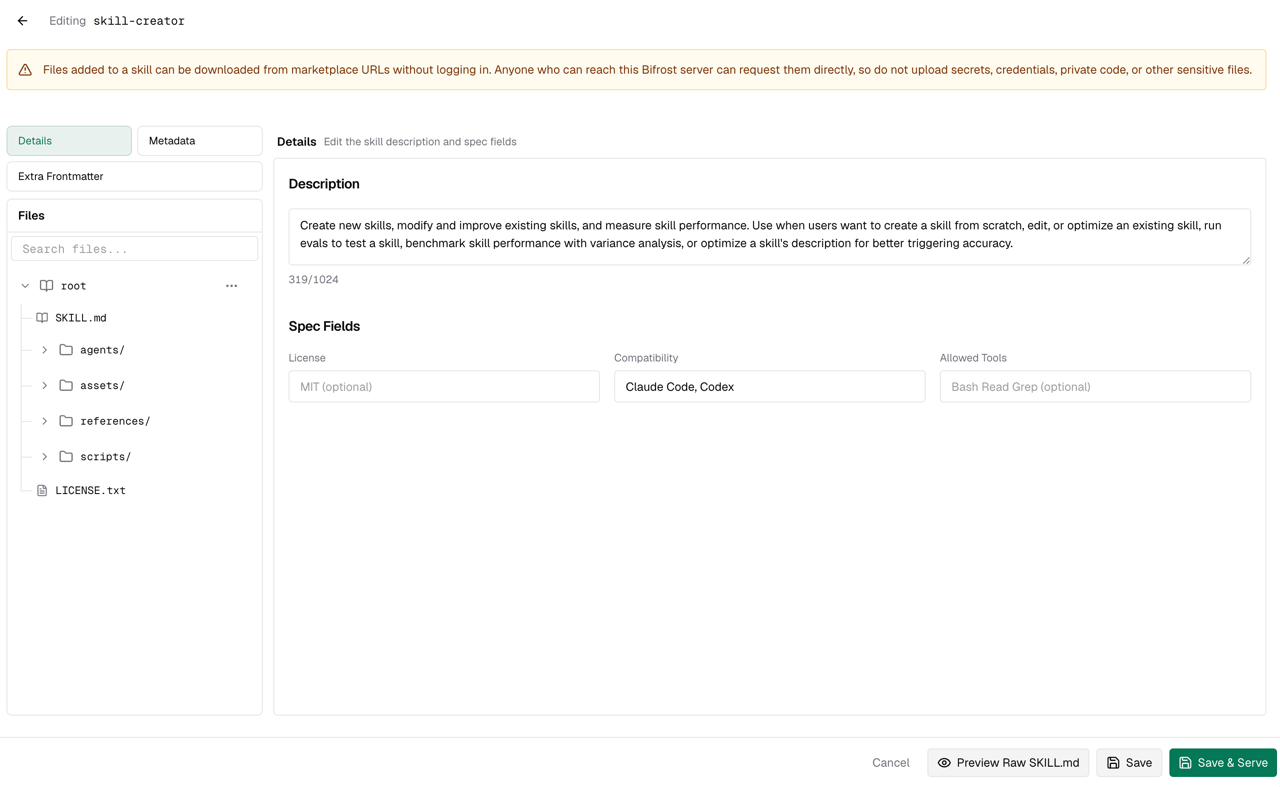
From the dashboard, open Skills Repository and click New Skill (or Create Skill from the empty-state page if no skills exist yet). The editor uses a two-pane workspace. The left sidebar has three navigation buttons — Details, Metadata, and Extra Frontmatter — above the file tree. Clicking a button switches the right pane to the corresponding editor.1. Fill the skill details
Click Details in the left sidebar to open the details pane. Fill in the fields that describe the skill:| Field | What it does |
|---|---|
| Name | The stable skill identifier. Use lowercase letters, numbers, and hyphens. The name cannot be changed after creation. |
| Description | A short explanation shown in the dashboard and marketplaces. |
| License | Optional SPDX-style license identifier shown in the generated SKILL.md frontmatter, such as MIT or Apache-2.0. |
| Compatibility | Optional list of skill-aware harnesses this skill is intended to work with, such as Claude Code or Codex. |
| Allowed tools | Optional, experimental frontmatter that compatible harnesses may use to allow or restrict tool usage for the skill. |
metadata: in SKILL.md. Click Extra Frontmatter to open a JSON editor for additional top-level YAML frontmatter keys.
Version is not entered inline. You choose it in a dialog when you click Create Skill, right before publishing.
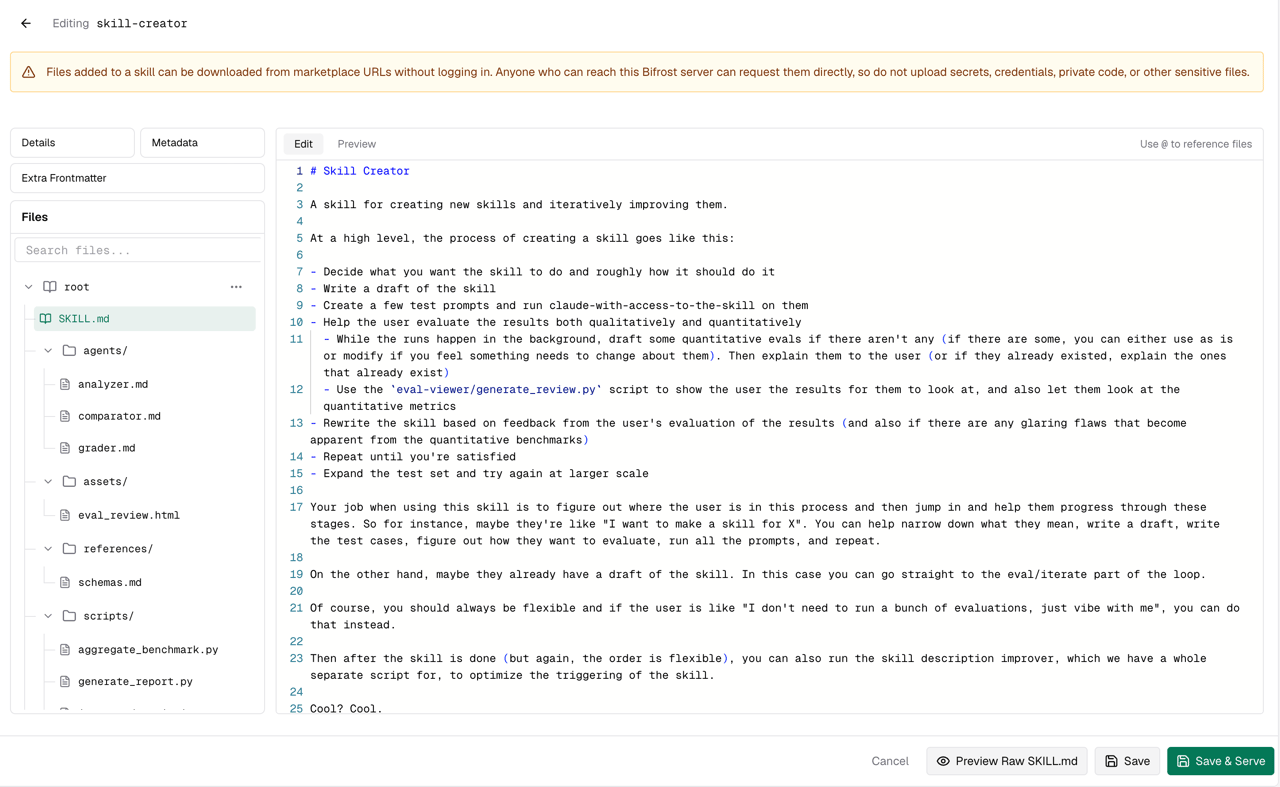
2. Write the SKILL.md body
Click the SKILL.md node in the file tree on the left sidebar to open the markdown editor. The editor stores only the Markdown body of SKILL.md. Bifrost generates the YAML frontmatter from the fields above, then appends this body underneath it.
The editor has Edit and Preview tabs so you can switch between writing and previewing the rendered output.
Use this space for the instructions that should load after a harness activates the skill. Keep discovery fields such as name, description, license, compatibility, allowed tools, and metadata in the sidebar panes.
For the canonical guidance on writing effective Agent Skills, use the Agent Skills docs:
If your skill depends on supporting files, upload them in the file manager below and reference them from the body with
@.
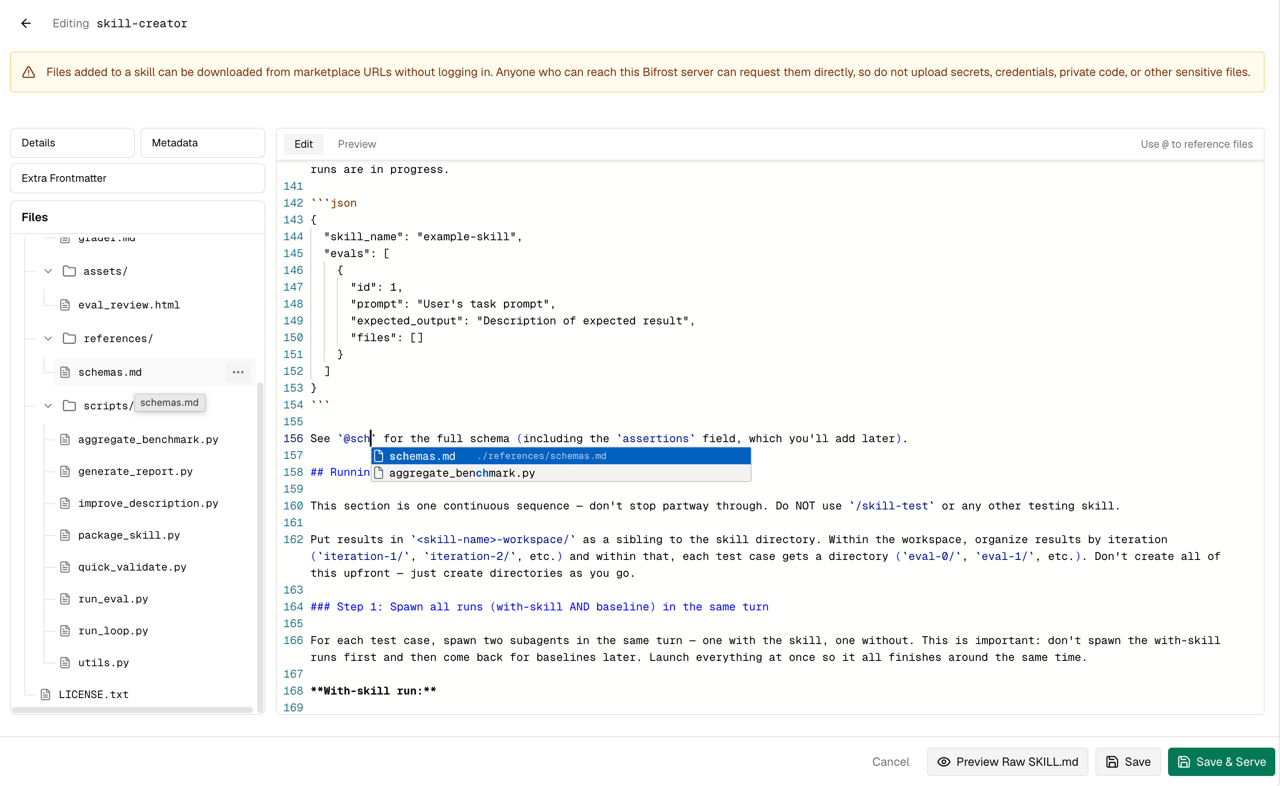
3. Reference files with @
When your skill body needs to point to an uploaded file, type @ in the markdown editor. A dropdown appears listing matching files and folders from the file tree, showing each item’s name alongside its relative path. Select an entry and Bifrost inserts a markdown link for you:
@sty, pick the file from the dropdown, and the editor expands it into the full relative-path link.
Add files and folders
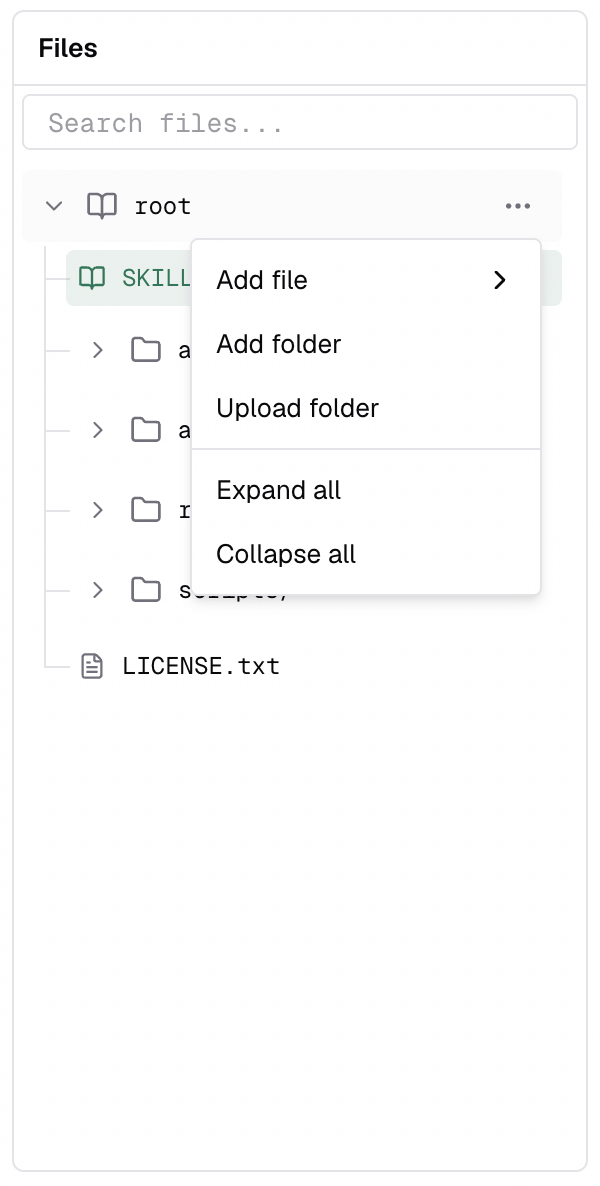
The Files section in the left sidebar below the pane-selector buttons is where you attach scripts, references, templates, and any other supporting content the skill needs. The file tree starts at root with theSKILL.md node at the top. A search bar above the tree lets you filter files by path. The context menu on each row gives you three actions:
- Add file — add a single file into that location
- Add Folder — create a new empty subfolder (type the name and confirm with the checkmark)
- Upload folder — upload an entire folder from your machine, preserving its structure
Adding a file
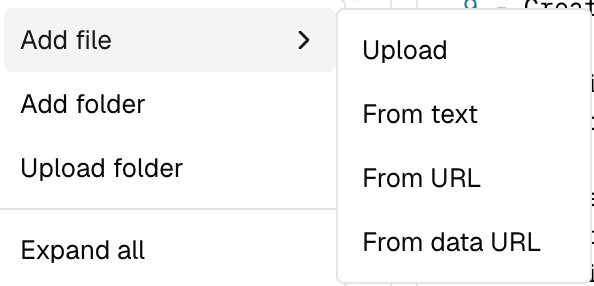
Choosing Add file gives you four source types:| Source | What it does |
|---|---|
| Upload | Pick a file from your machine to upload directly. |
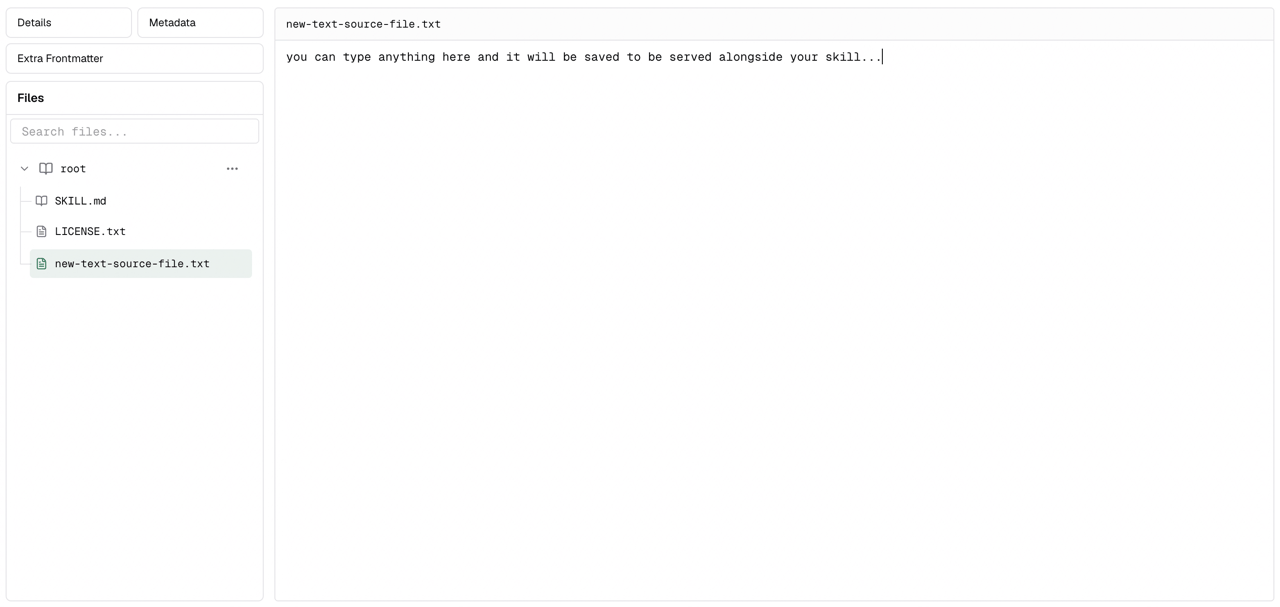
| From text | Creates a file you can write or paste content into directly. |
| From URL | References an http:// or https:// URL. The content is fetched from that URL when the skill is served, so it stays up to date with the remote source. |
| From data URL | References a data: URL for content you already have base64-encoded or inline. |
- Text: A free-form text area where you type or paste the file content.
- URL: A single text input to paste the URL, with a note that it is stored as a live reference.
- Data URL: A text area to paste the data URL.
- Upload: A file picker to select and upload the file directly.
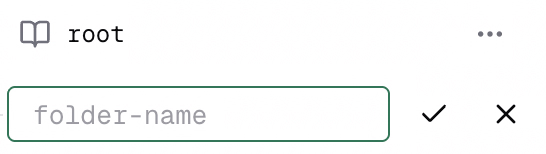
Creating a folder
Click Add folder and an inline text input appears with afolder-name placeholder. Type your folder name and confirm with the checkmark. The new folder appears in the tree immediately, with its own set of Add file, Add folder and Upload folder buttons.
Uploading a folder
Click Upload folder to bring in an entire directory from your machine. Bifrost preserves the folder structure and creates each file under its original relative path.Moving files and folders
In the context menu of any file you will find the move option. Clicking it opens a submenu listing every folder and subfolder in the tree. Pick the destination and the item moves there.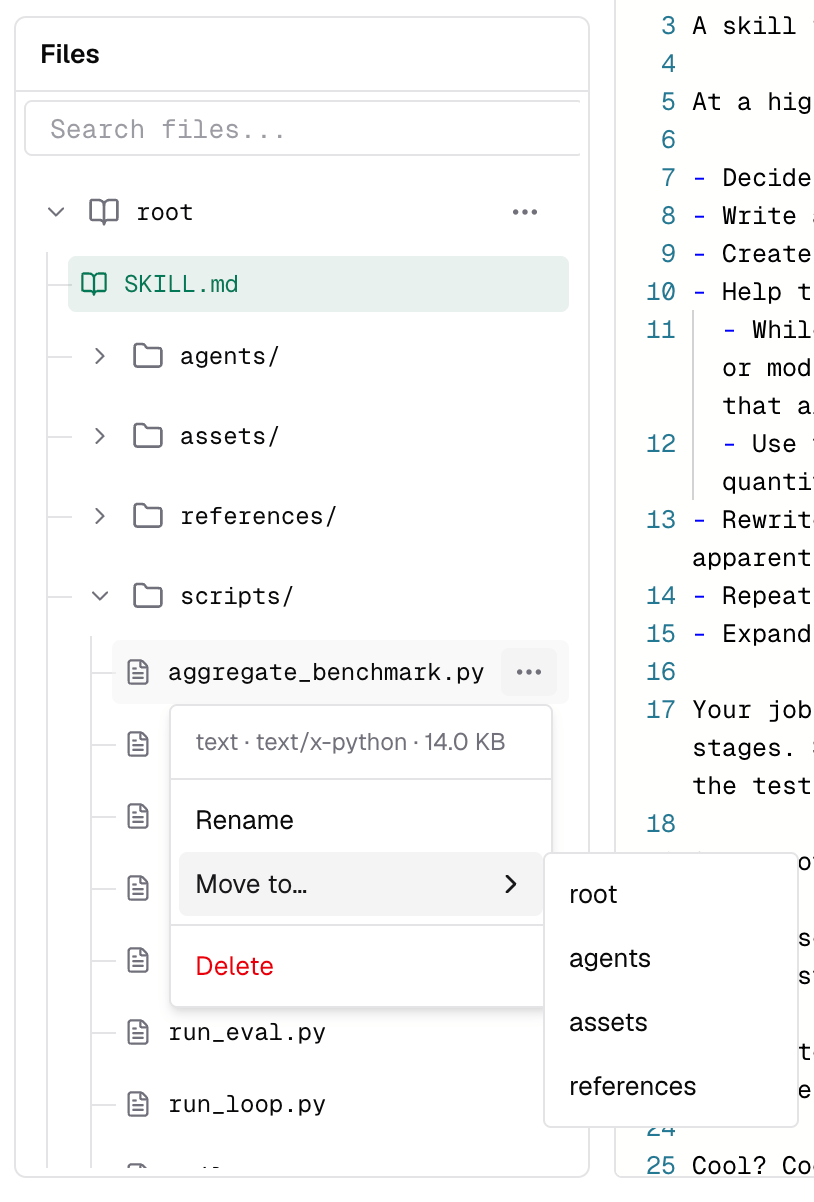
Storage and versioning
When you create a new version, Bifrost copies only the lightweight metadata: theSKILL.md content, description, frontmatter fields, and the file paths. The uploaded file objects themselves are not duplicated. Every version that references the same file points to the same underlying stored object, unless you change the contents of the file.
This means you can publish many versions of a skill with large attached files and your storage will not grow with each version. Storage only increases when you upload genuinely new files or modify the content of a file. Renaming or moving existing files across versions costs nothing extra.
When you delete a skill, all of its uploaded file objects are cleaned up alongside it.
Deleting a folder
Click the Delete option in a folder’s context menu to delete it. If the folder contains files, Bifrost asks for confirmation before removing everything inside it. The deletion is applied to the skill only after you save a new version.Publish a version
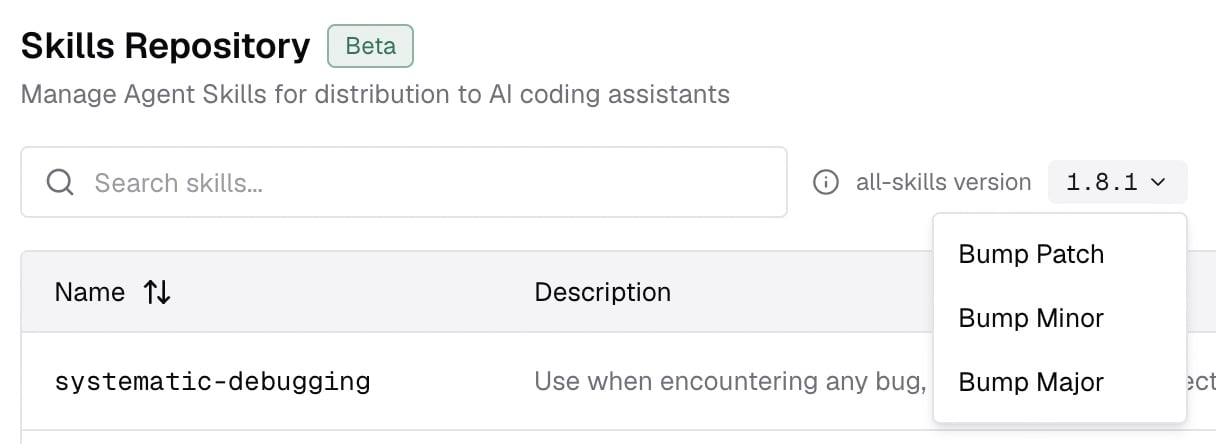
When the skill is ready, click Create Skill. A version dialog appears where you choose the version number. Bifrost creates the first immutable version and serves it immediately.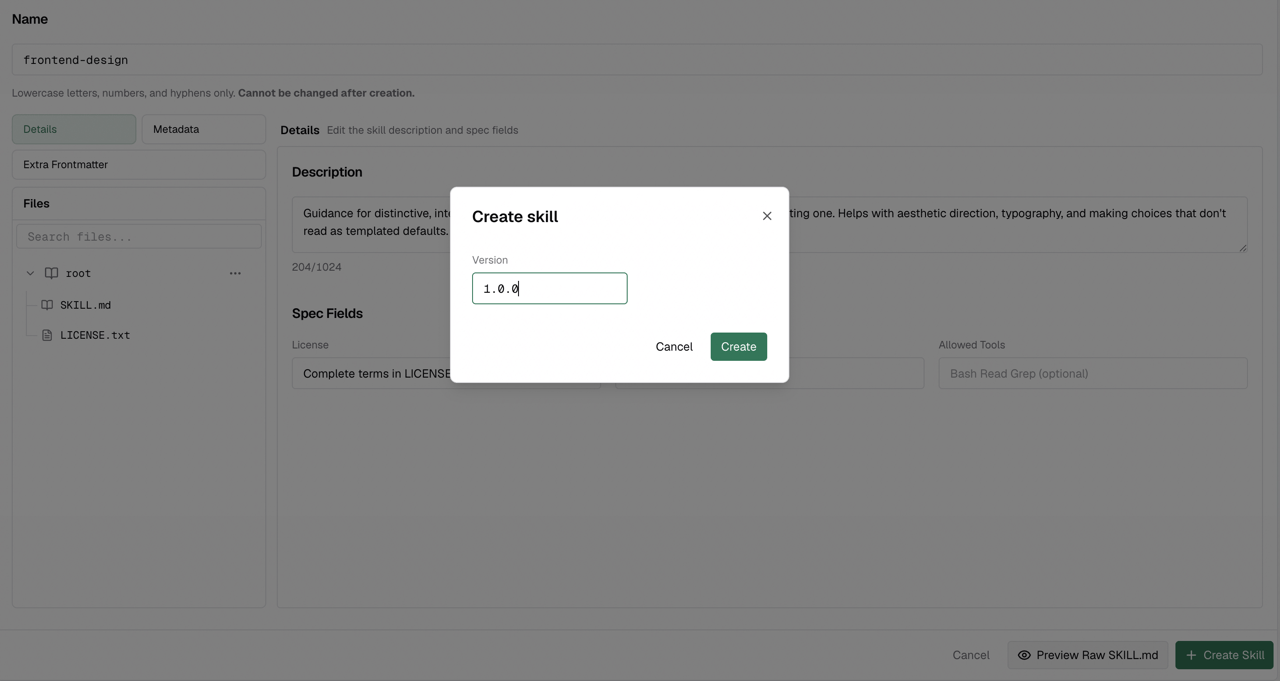
SemVer expectations
Skill versions use SemVer:| Bump | Use for |
|---|---|
| Patch | Small fixes that should be safe for existing users, such as typo fixes or clearer instructions. |
| Minor | New behavior, new files, or meaningful improvements that remain backward-compatible. |
| Major | Breaking changes, removed workflows, renamed required files, or behavior that could surprise existing users. |
| Suffix | Pre-release or iteration labels, such as 1.2.0-beta.1. A different suffix is still a new version. |
Adding new versions
Open a skill and click on Add New Version.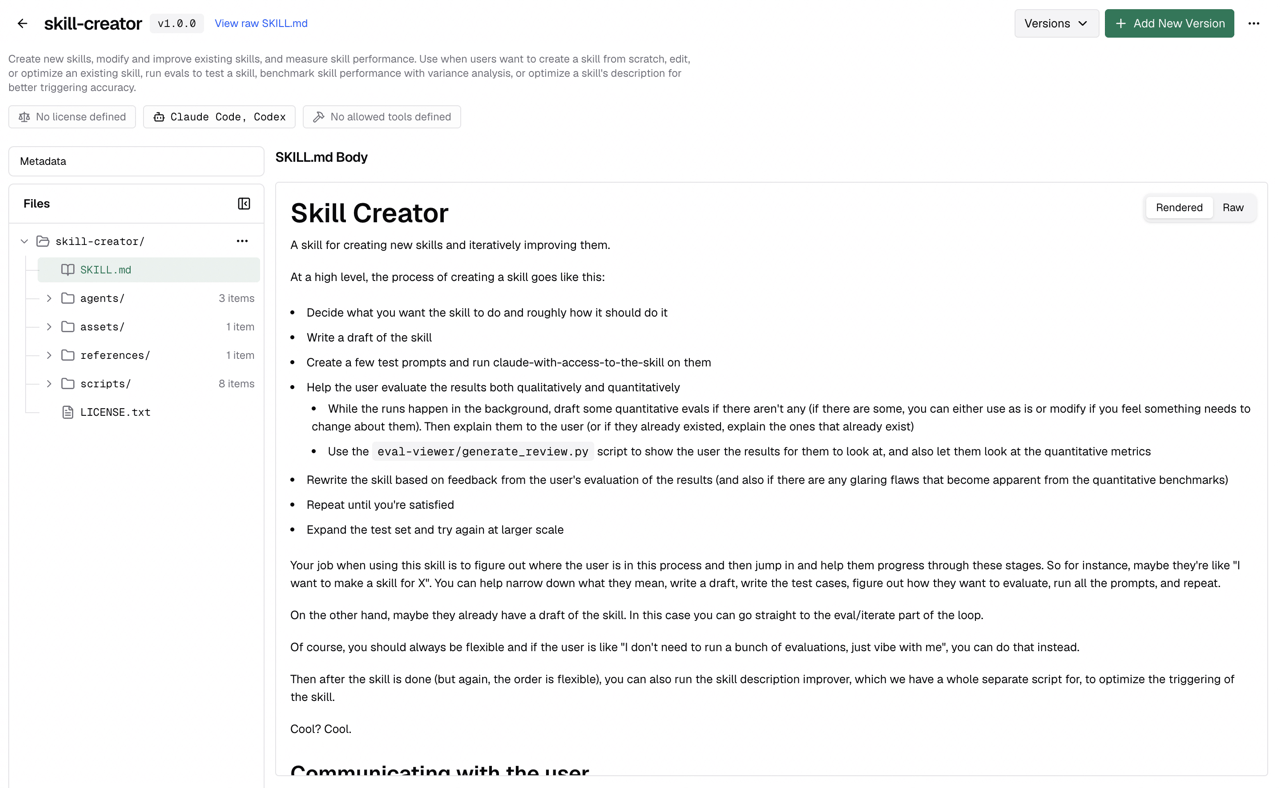
What changes in adding a new version?
- The name is locked. It is the stable identifier used by marketplace plugin names and install URLs.
- The description, frontmatter, metadata, body, and files can be updated using the same two-pane workspace as the create flow.
- You choose the new version in a dialog when you click Save or Save & Serve.
| Action | Result |
|---|---|
| Save | Creates a new version, but keeps the currently served version unchanged. |
| Save & Serve | Creates a new version and makes it the version users install from the marketplace. |
Deleting existing files
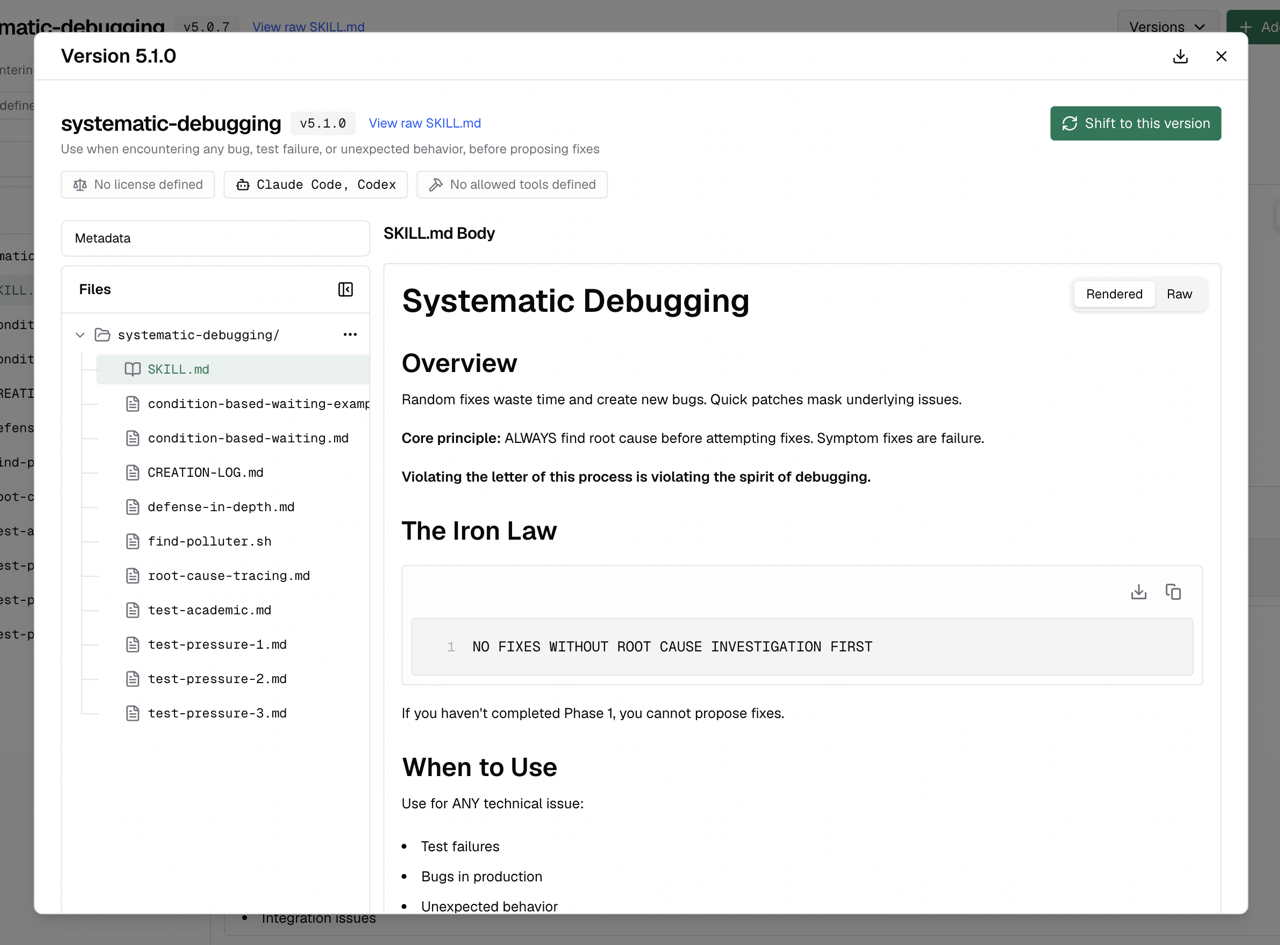
Removing an existing file means the next saved version will no longer track that file. Older versions still have their own snapshots.Switch the served version
Every saved version appears in the skill’s version history. Click Versions in the skill detail header to open the versions popover. You can search versions by version string using the search bar at the top of the popover.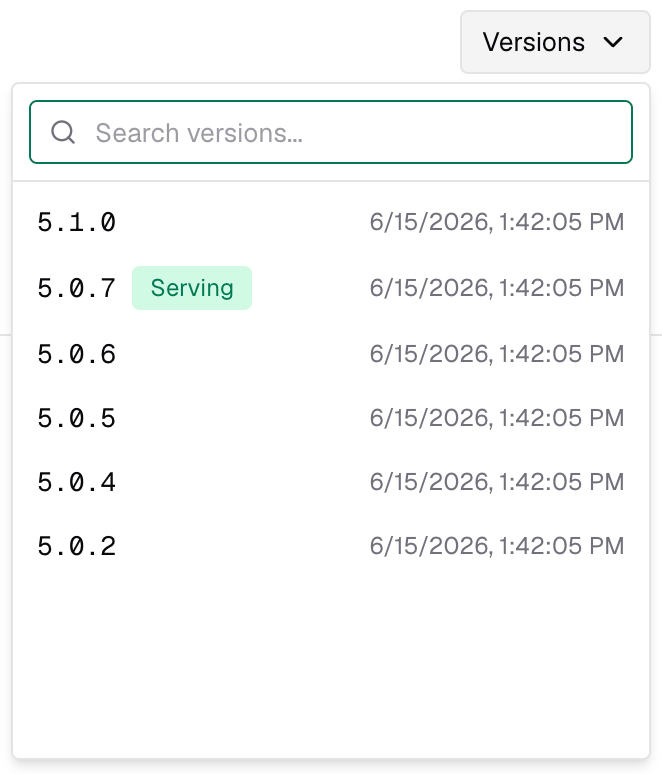
Version validation still compares against the highest created SemVer, not the version you shifted to. For example, if
3.0.0 exists and you shift back to 1.0.0, the next version still needs to be greater than or compatible with 3.0.0, such as 3.0.1, 3.1.0, or 4.0.0.Register Bifrost as a marketplace
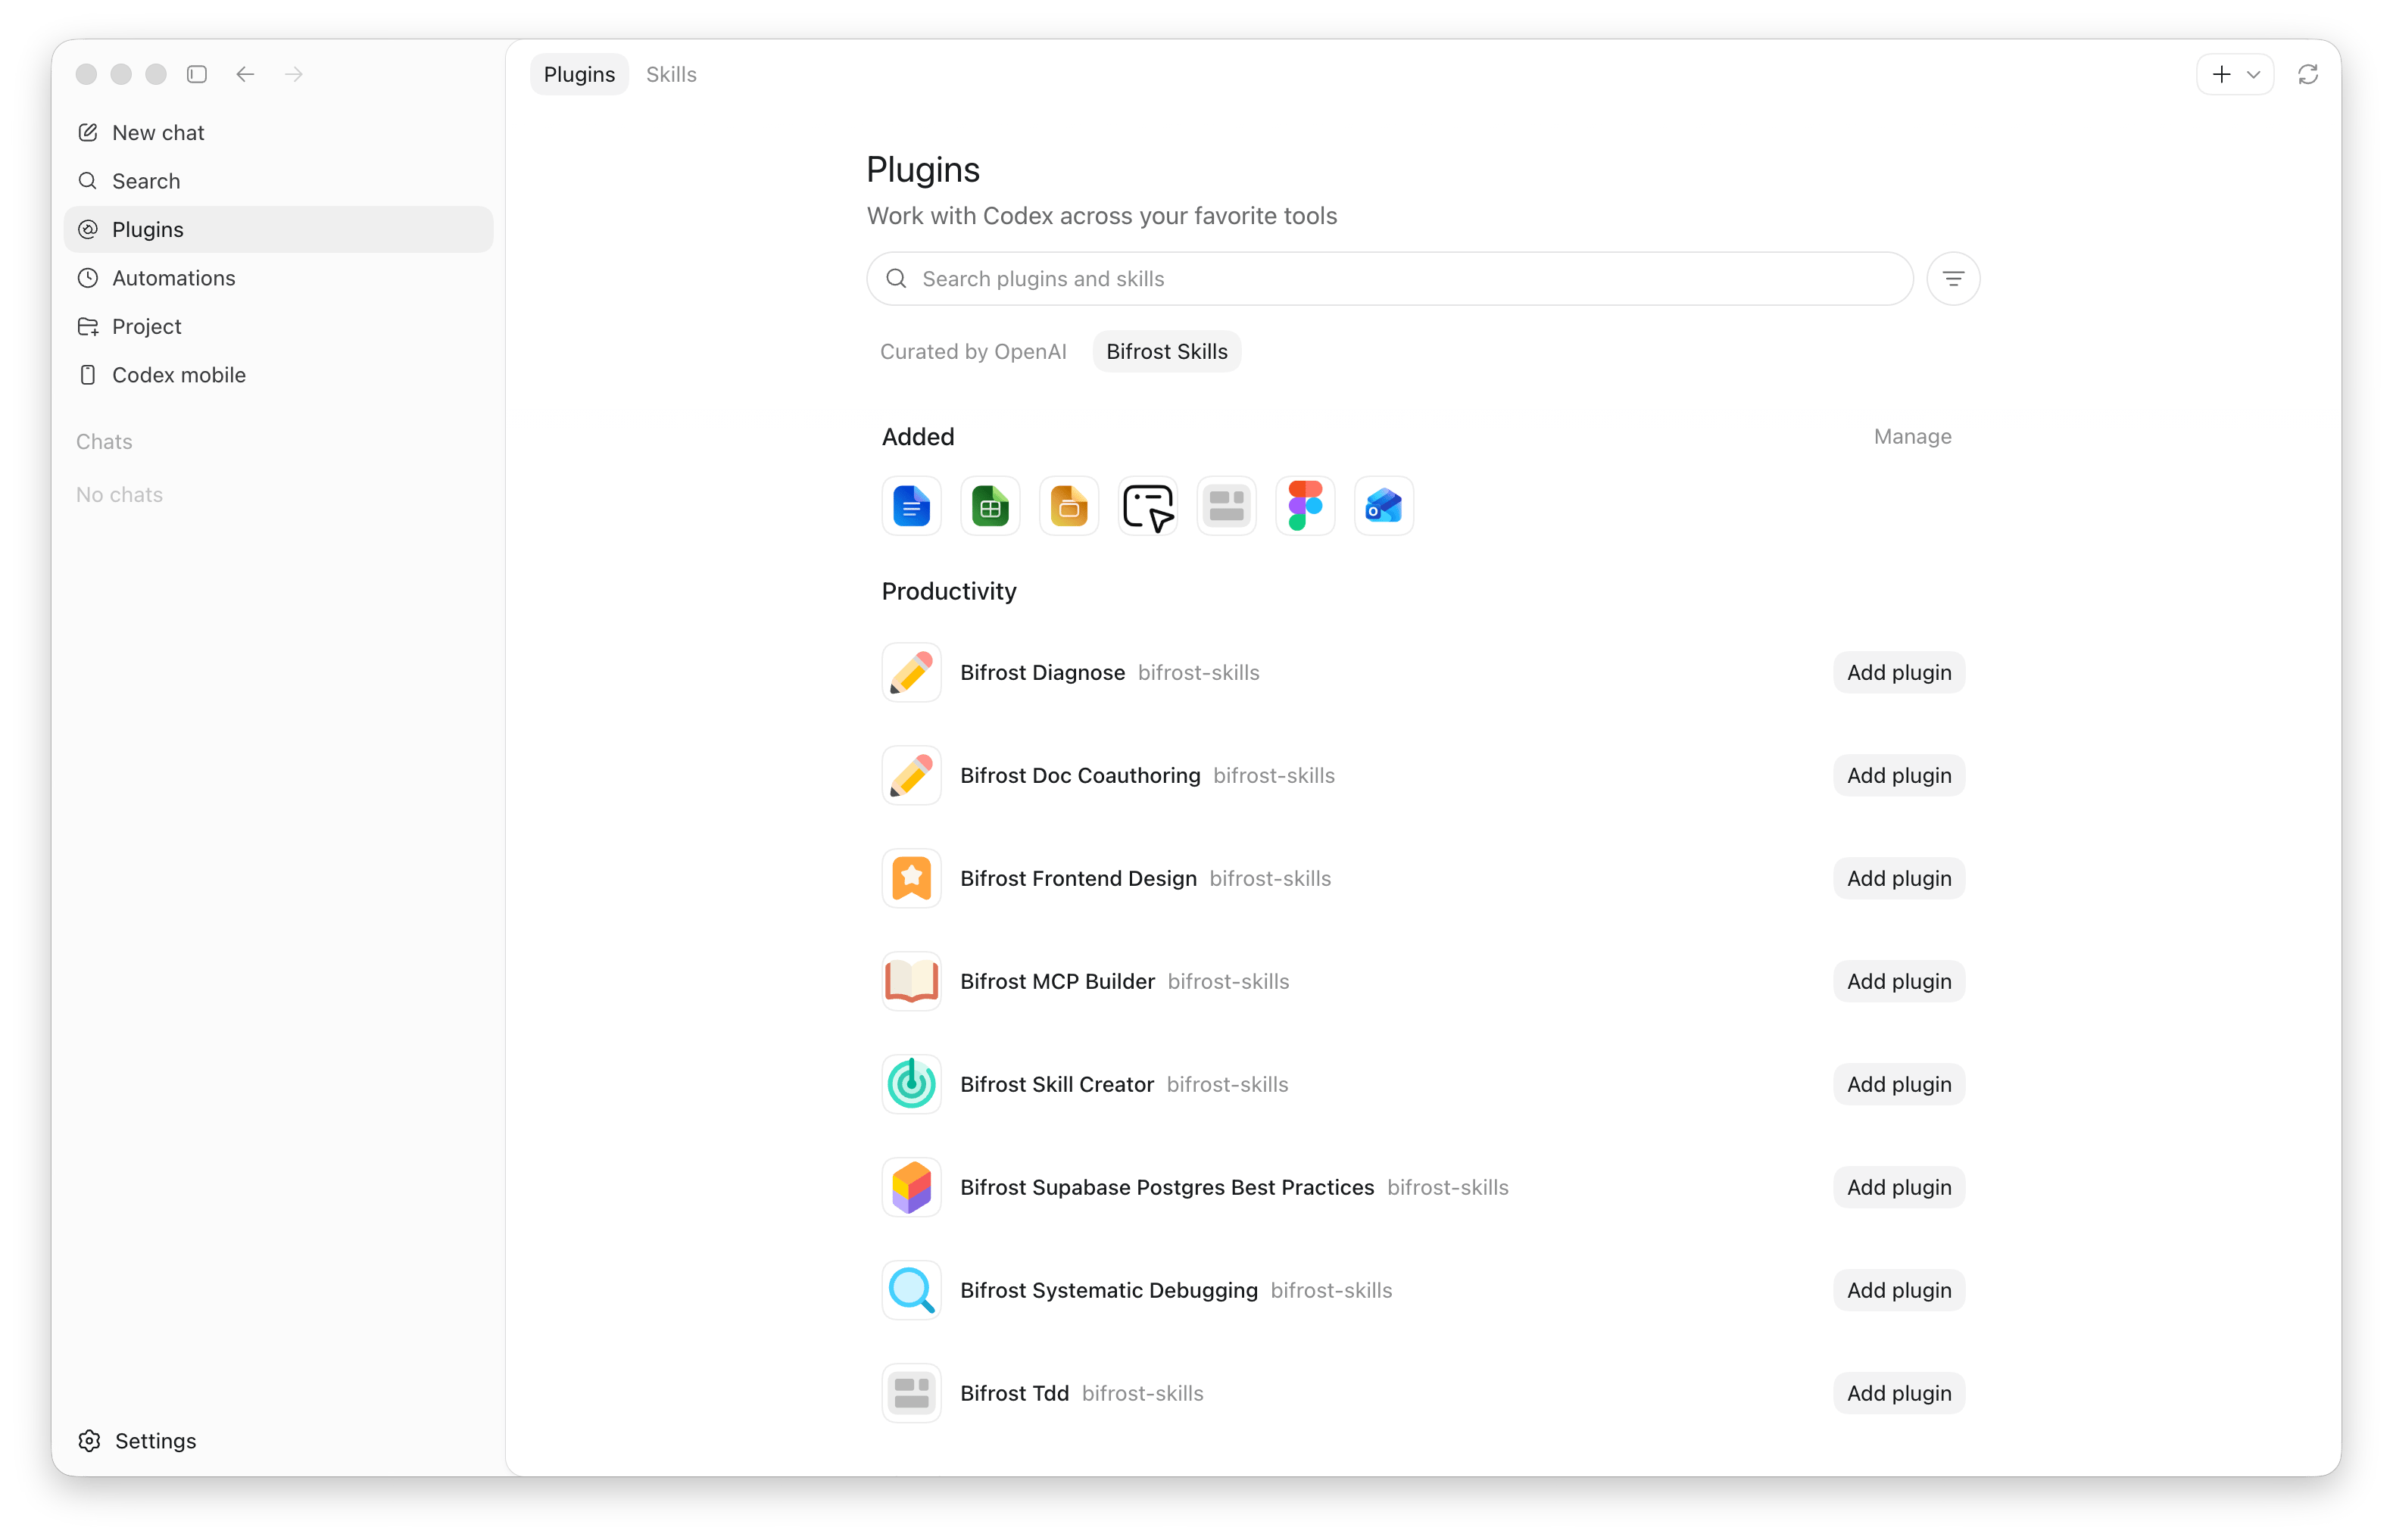
Once your repository has skills, click Register as Marketplace in the Skills Repository header. A popover shows copyable CLI commands for each supported harness.
Claude Code
Codex
The marketplace install flow requires the
git binary on the Bifrost server. If Git is unavailable, the dashboard disables marketplace registration and explains that Bifrost must be restarted after Git is installed.Install skills from the marketplace
After registration, each skill appears as its own plugin using the name:review-migrations is exposed as:
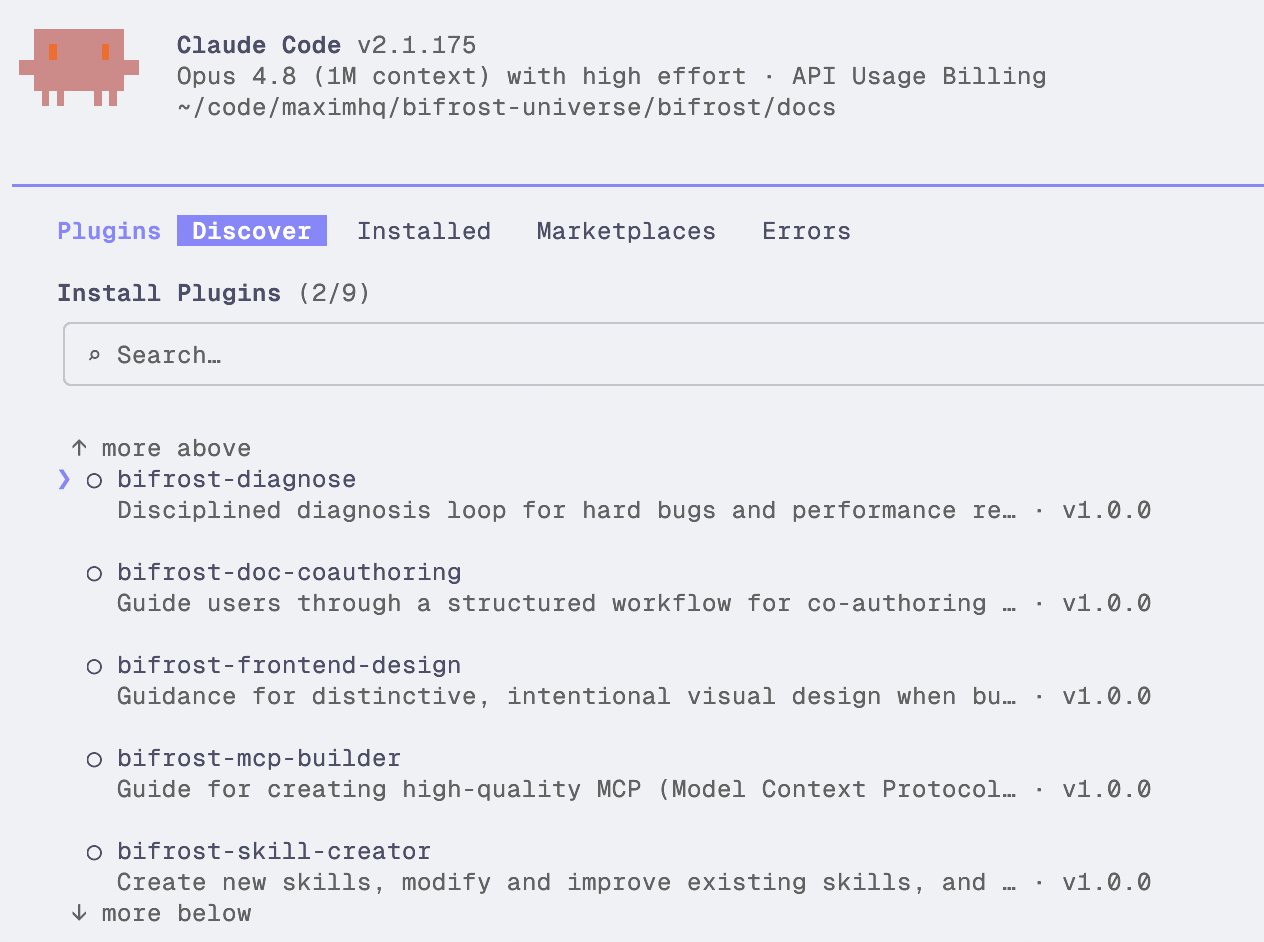
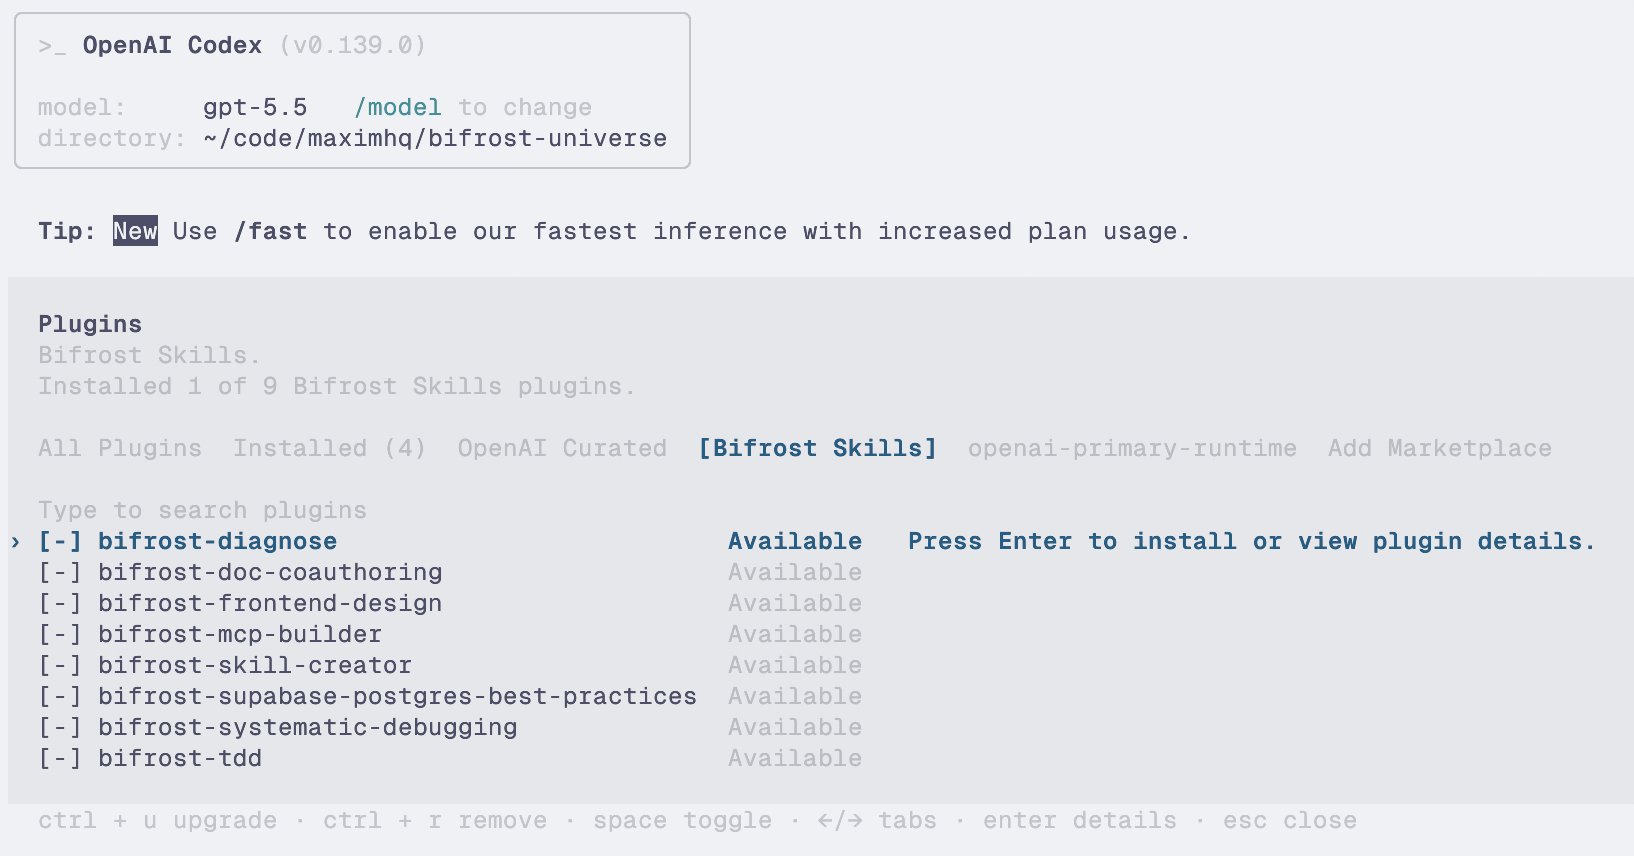
Use the all-skills plugin
Bifrost also exposes a synthetic plugin:How all-skills versioning works
Thebifrost-all-skills plugin has its own version. Bifrost maintains it automatically:
| Repository event | All-skills bump |
|---|---|
| First skill is published | 0.0.0 → 1.0.0 |
| Another skill is added | Minor |
| A skill is deleted | Major |
| A served skill gets a patch bump | Patch |
| A served skill gets a minor bump | Minor |
| A served skill gets a major bump | Major |
| Served version is shifted | Patch |
Maintain skills through the API
Use the Skills API for automation
Use the Skills API for automation
Use the dashboard for interactive editing, and use the API when you want to sync skills from CI, an internal admin panel, or another source of truth.
API workflow
- Create the skill and its first version with Create skill. Include the
SKILL.mdbody, frontmatter fields, version, and any files that should be attached to that first version. - For file attachments, pass file entries directly in the create/update request. Use inline text, URLs, data URLs, or an
upload_id.
Use Upload skill file when you need to upload a local/binary file first. The upload response gives you an
upload_id that you can attach in Create skill or Update skill.- Create new immutable versions with Update skill. Use save without serving when you want to stage a version, and save and serve when the marketplace should switch to it immediately.
- Inspect the currently served skill with Get skill. Pass the
versionquery parameter to load a specific historical snapshot. - Inspect the full version history with List skill versions. Use the
searchquery parameter to filter by version string when you only need a specific release or prefix. - Roll the serving version back or forward with Shift served skill version.
- Track or nudge the bundled plugin with Get all-skills version and Bump all-skills version.
The API reference contains the exact request and response shapes. Keep this page as the product workflow, and use the reference pages when wiring automation.
Quick mental model
- A skill is the stable identity.
- Every save creates an immutable version.
- Files belong to versions so older installs remain reproducible.
- The served version is what marketplaces expose.
- Individual marketplace plugins install one skill.
bifrost-all-skillsinstalls every served skill and is versioned automatically.